preface
一直以来我在 Linux 终端用的 shell 都是 zsh,相比默认的 bash 来说,配合上插件的 zsh 功能更加强大并且十分美观,今天刚好要在服务器上重新配置一遍,顺便就记录一下。
安装 zsh
zsh 在默认的情况下是没有安装的(除非是 Mac),因此我们得先将 zsh 安装好,我这里是 centOS 的服务器,所以用 yum 包管理器安装,ubuntu 直接用 apt 是一样的
$ yum install zsh
安装完成后用 cat /etc/shells 可以看到机器上现存的 shell 的种类
/bin/sh
/bin/bash
/usr/bin/sh
/usr/bin/bash
/bin/zsh
然后将我们默认的 shell 变成 zsh,重启终端,输入 echo $SHELL 就可以看到此时的 shell 变成了 zsh
$ chsh -s /bin/zsh
安装 oh-my-zsh
默认的 zsh 用起来没啥感觉,我们得配合上 oh-my-zsh 来使用。安装 oh-my-zsh 直接用官方 GitHub 上的命令将安装脚本 wget 下来再进行安装
sh -c "$(wget -O- https://raw.githubusercontent.com/ohmyzsh/ohmyzsh/master/tools/install.sh)"
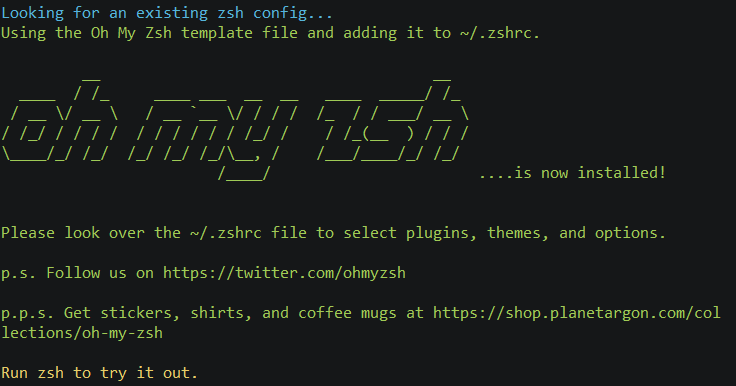
经过一段时间的安装之后就会出现这个界面,代表 oh-my-zsh 已经安装好了

然后重启终端就能够看到漂亮的界面了!

安装插件
oh-my-zsh 自带了十分多的插件,插件目录在 .oh-my-zsh/plugins 里面,默认开启了 git 插件,其实还有很多好用的插件,比如只需要输入 extract 就能够解压压缩包的 extract 插件,也有 GitHub 上开源的插件,配合上这些插件真的可以使效率提高。
插件管理器 antigen
说到插件就不得不提 antigen 了,这回配置插件我都是用的 antigen,不得不说比上次一个一个下载舒服多了,只需要在 .zshrc 文件中加上一下插件名字 antigen 就会自动帮我们下载好插件,我们来看看怎么安装这玩意
ubuntu 系统下直接用 apt 包管理器进行安装
$ apt-get install zsh-antigen
centOS 或者没有 sudo 权限的话就将仓库 clone 下来,最好 clone 到隐藏目录,因为平时不用用到它
$ git clone https://github.com/zsh-users/antigen.git ~/.antigen
接下来对 .zshrc 进行编辑,一个标准的案例如下所示
source /path-to-antigen/antigen.zsh

# Load the oh-my-zsh's library.
antigen use oh-my-zsh

# Bundles from the default repo (robbyrussell's oh-my-zsh).
antigen bundle git
antigen bundle docker
antigen bundle command-not-found

# Syntax highlighting bundle.
antigen bundle zsh-users/zsh-syntax-highlighting

# Load the theme.
antigen theme robbyrussell

# Tell Antigen that you're done.
antigen apply
推荐几个挺牛逼的插件,基本都是在 GitHub 的 zsh-users 项目中能够找到的,也能够直接被 antigen 安装,在上面的文件中直接加入下面几行就行了
antigen bundle zsh-users/zsh-autosuggestions
antigen bundle zsh-users/zsh-completions
使用 oh-my-zsh 自带的插件也只需要 antigen bundle <plugin> 就行了,插件在 oh-my-zsh/plugins 中可以找到,有很多很多,官方的插件介绍在这里可以找到,其中推荐一款插件叫 autojump ,需要先在电脑上安装好才能在 .zshrc 里面添加插件
$ yum install autojump-zsh
主题
这个没啥说的,主题浏览在这儿,选择自己喜欢的就行了,不过有些需要下载 powerline 字体才能显示出各种炫酷的 emoji,其实 JetBrains Mono 这款字体就挺不错的,我比较喜欢的三款主题是默认的主题和 ys 以及 agnoster。
p.s.
另外,在 zsh 下,可能用不了 HOME 和 END 键,网上搜了一下,需要在 .zshrc 中加入下面这些内容
# key bindings
bindkey "\e[1~" beginning-of-line
bindkey "\e[4~" end-of-line
bindkey "\e[5~" beginning-of-history
bindkey "\e[6~" end-of-history
bindkey "\e[3~" delete-char
bindkey "\e[2~" quoted-insert
bindkey "\e[5C" forward-word
bindkey "\eOc" emacs-forward-word
bindkey "\e[5D" backward-word
bindkey "\eOd" emacs-backward-word
bindkey "\ee[C" forward-word
bindkey "\ee[D" backward-word
bindkey "^H" backward-delete-word
# for rxvt
bindkey "\e[8~" end-of-line
bindkey "\e[7~" beginning-of-line
# for non RH/Debian xterm, can't hurt for RH/DEbian xterm
bindkey "\eOH" beginning-of-line
bindkey "\eOF" end-of-line
# for freebsd console
bindkey "\e[H" beginning-of-line
bindkey "\e[F" end-of-line
# completion in the middle of a line
bindkey '^i' expand-or-complete-prefix
强烈建议使用新机子前先参照本篇文章进行 zsh 的配置,舒服的不是一点点!